As Halloween approaches, many people are looking forward to one of the most beloved traditions of the season – pumpkin carving. The creative aspect of transforming a simple orange fruit into a custom-designed masterpiece brings joy and excitement to both children and adults. However, once the carving is complete, the reality of the messy aftermath sinks in.
Pumpkin carving clean up can be a haunting task, as it involves removing sticky pulp, seeds, and bits of flesh scattered around the carving area. To make the process more manageable and efficient, there are several tips and tricks that can help. Homes at Heart is here to share the best practices for pumpkin carving clean-up, including prepping the carving area, using the right tools, and tackling the mess effectively. By following these tips, you can enjoy the fun and creativity of pumpkin carving without the stress of a messy clean-up.
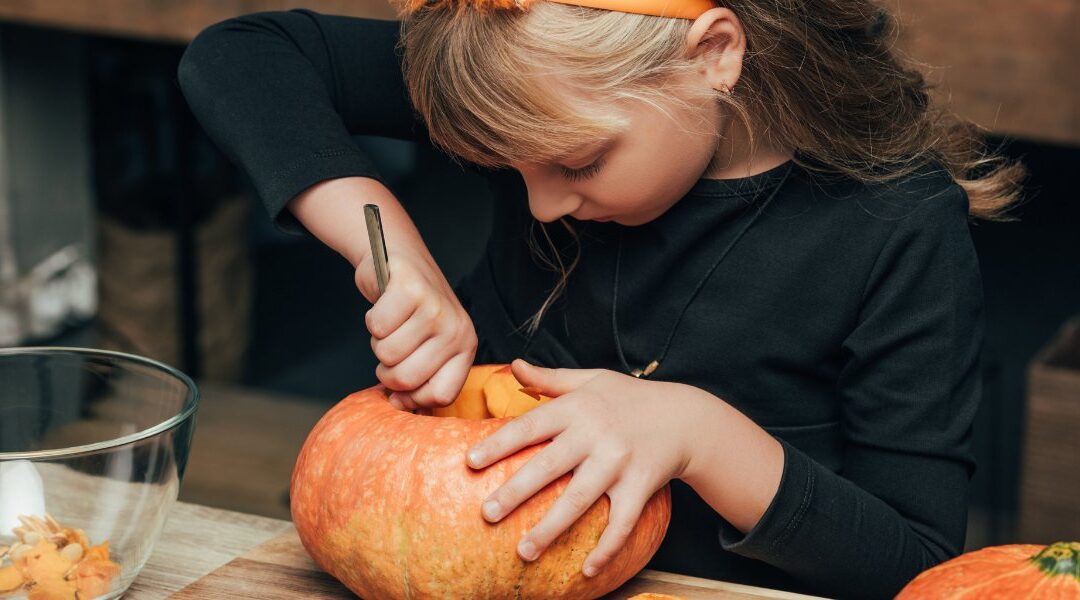
Steps to Take When Preparing for Pumpkin Carving
Before starting the carving process, it is important to properly prepare to ensure a smooth and successful experience. Before doing anything else, choose a designated area to perform all your pumpkin carving. This can be a specific table or workbench that provides enough space for the carving project. After you have chosen your carving station, It is also important to gather all the necessary cleaning supplies and tools you will need to have all necessary items ready and on hand for use. Cleaning supplies can include a soft brush, mild soap, and water.
An additional tip to make the clean-up process even easier is to lay down newspaper or a protective covering on the work surface. This protective covering will catch any guts or shavings that may result from the carving process. By carefully preparing the carving area and organizing the necessary supplies, the carver can minimize the risk of accidents, ensure the tools are clean and ready, and create a conducive environment for the carving process.
Ready To Get Started?
Tips to Reduce the Mess During Pumpkin Carving
No way to get around it, pumpkin carving is a messy business. However, there are a few tips and tricks you can follow to help reduce the mess and make the clean-up process easier. Make sure to remove the pumpkin seeds and pulp efficiently by using a scraper or spoon. Using proper pumpkin carving tools will help minimize the mess and ensure that the pumpkin is hollowed out properly.
Create a trash disposal system near the carving area. This can be as simple as placing a garbage bag or container nearby to collect all the scraps and waste. By having a designated place for disposal, you can prevent the mess from spreading throughout your workspace.
Remember to wipe down the pumpkin’s exterior periodically to avoid buildup. As you carve, pumpkin pulp and seeds may accumulate on the pumpkin’s surface, making it harder to handle and creating a mess. By regularly wiping it down with a damp cloth or paper towel, you can keep the pumpkin clean and manageable throughout the carving process. These small steps can go a long way in reducing the mess and making your pumpkin carving experience more enjoyable.
Cleaning Up the Carved Pumpkin
After you have your spooky work of art finished, the cleaning is not over yet. After you have made sure your pumpkins are completely finished, it is important to carefully remove any remaining seeds and pulp left on the inside of the pumpkin. This can be done using a spoon or your hands, being careful not to damage the pumpkin’s walls. Once the leftover seeds and pulp have been removed, it is a good idea to rinse the pumpkin’s interior with water. This helps to remove any residual pulp and makes the cleaning process more effective.
After rinsing, allow the pumpkin to dry thoroughly before proceeding. Drying the pumpkins prevents any moisture from lingering inside and causing the pumpkin to rot. Once the pumpkin is dry, you can further clean the exterior using a damp cloth or sponge. To keep your carved pumpkin looking fresh for longer, consider applying a thin layer of petroleum jelly to the cut edges. This helps to seal in the moisture and delay the wilting process. With these tips in mind, cleaning up your carved pumpkin can be a breeze.
Cleaning Up the Carving Area
Now that your personalized spooky decoration has been cleaned and placed on display, it is time to clean up your carving area so you don’t leave it looking like a murder scene. To start, it is important to collect and dispose of all waste materials properly. This includes removing any leftover pumpkin scraps, used tea lights, and any other debris. Proper disposal will minimize the risk of attracting pests and keep the area clean and safe.
Cleaning and disinfecting the carving tools to prevent the spread of bacteria or any remaining pumpkin residue cannot be overlooked. This can be achieved by washing the tools thoroughly with soap and warm water and then using a suitable disinfectant. Like your carving tools, wipe down and sanitize the work surface in the same way. This helps remove any pumpkin juice or germs that may have accumulated during the carving process. Using a multi-purpose household cleaner or a mixture of water and vinegar can effectively sanitize the surface. By following these steps, we can ensure a clean and organized pumpkin carving area, promoting a safe and enjoyable experience for everyone involved.
Homes at Heart hopes you have a scary good time this holiday season. As we begin to move further into the holidays, check back in regularly for more holiday cleaning tips, like 10 ways to make your home smell like Christmas.
As always, we are proud to happily serve the Medicine Hat area and are available to answer any questions you might have. Contact us at any time or request a quote on our website to see how we can best serve you.